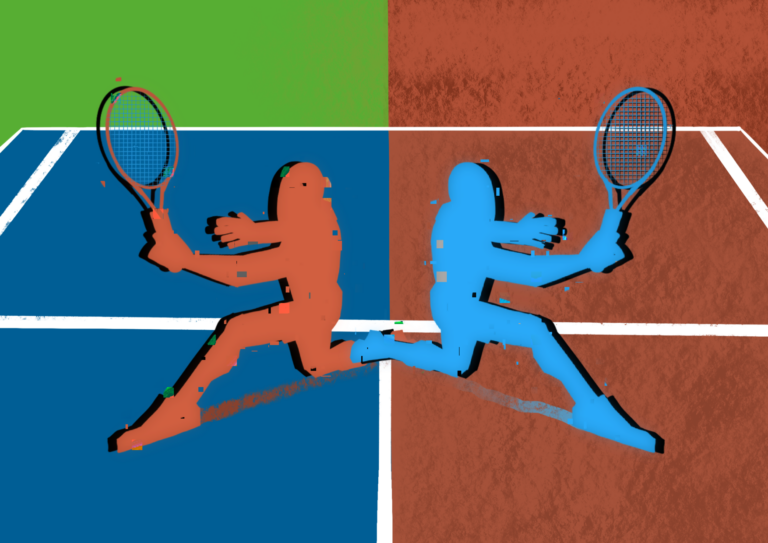
How to Hit a Tennis Serve: 6 Steps
The most essential shot in tennis, may also be the most difficult. A tennis serve not only starts every point but goes a long way in dictating the outcome of each game, set, and match. There are a lot of moving parts in a serve that require a fair amount of coordination and technique but it becomes easier when you start to break it down in steps. Follow these 6 steps that make up a tennis serve.
1. Find the Right Stance and Grip
Your opening stance is about comfort. Knowing how and where to stand will allow you to feel relaxed pre-toss.
- Get your front foot facing the net post
- if you’re a righty, your front foot will face the right net post. The opposite for lefties.
- Once you get your front foot in place our back foot should be parallel to the baseline
- The front of your back foot to line up with the heels of your front foot
- Ultimately, stand the way that feels most comfortabe

Now, let’s make sure you have the right grip. The grip for your serve should be a continental grip.
- Imagine you are shaking hands with the tennis racquet
- Hold the racquet completely straight, with the racquet head straight on
- Place the heel pad of your hand and index finger knuckle on bevel #2 (bevel #7 for lefties)
- Your thumb and forefinger create a V on the top of the handle when holding correctly
2. Ball Toss and Taking the Racquet Back
Getting your toss in the right spot can be one of the most challenging aspects of the serve but it sets you up for success.
- To gear up, and muster up enough energy to hit a solid serve, bend your knees, and then straighten your arm holding the ball, waiting until the ball reaches eye level to release. The best toss will be high enough that you can make contact with the ball with a straight racquet without feeling choked up or cramped in any way.
To check your toss, make sure the ball is in the middle of your hand and that you toss it straight up, not to the left or right because this can throw off your balance. Too short of a toss can hinder your serve, too. Once again, the best toss will let your arm almost fully extend to toss the ball.
Taking the racquet back will happen the same time as the ball toss. When your tossing arm moves up, swing your serving arm as if it was moving from 12 to 6 on a clock, like swinging a pendulum. Stay loose and relaxed to get your best swing.
Make sure you practice this with your swing so that you get both parts together! Otherwise, if you just practice the toss alone, you won’t get into a solid rhythm.
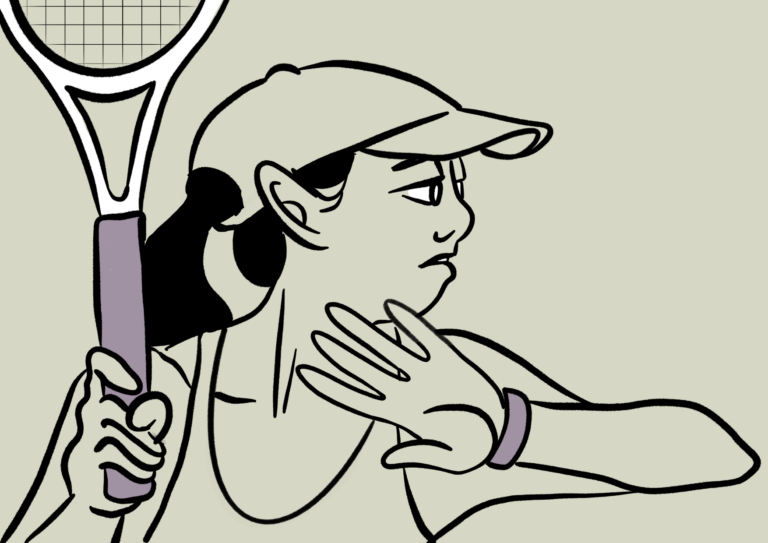
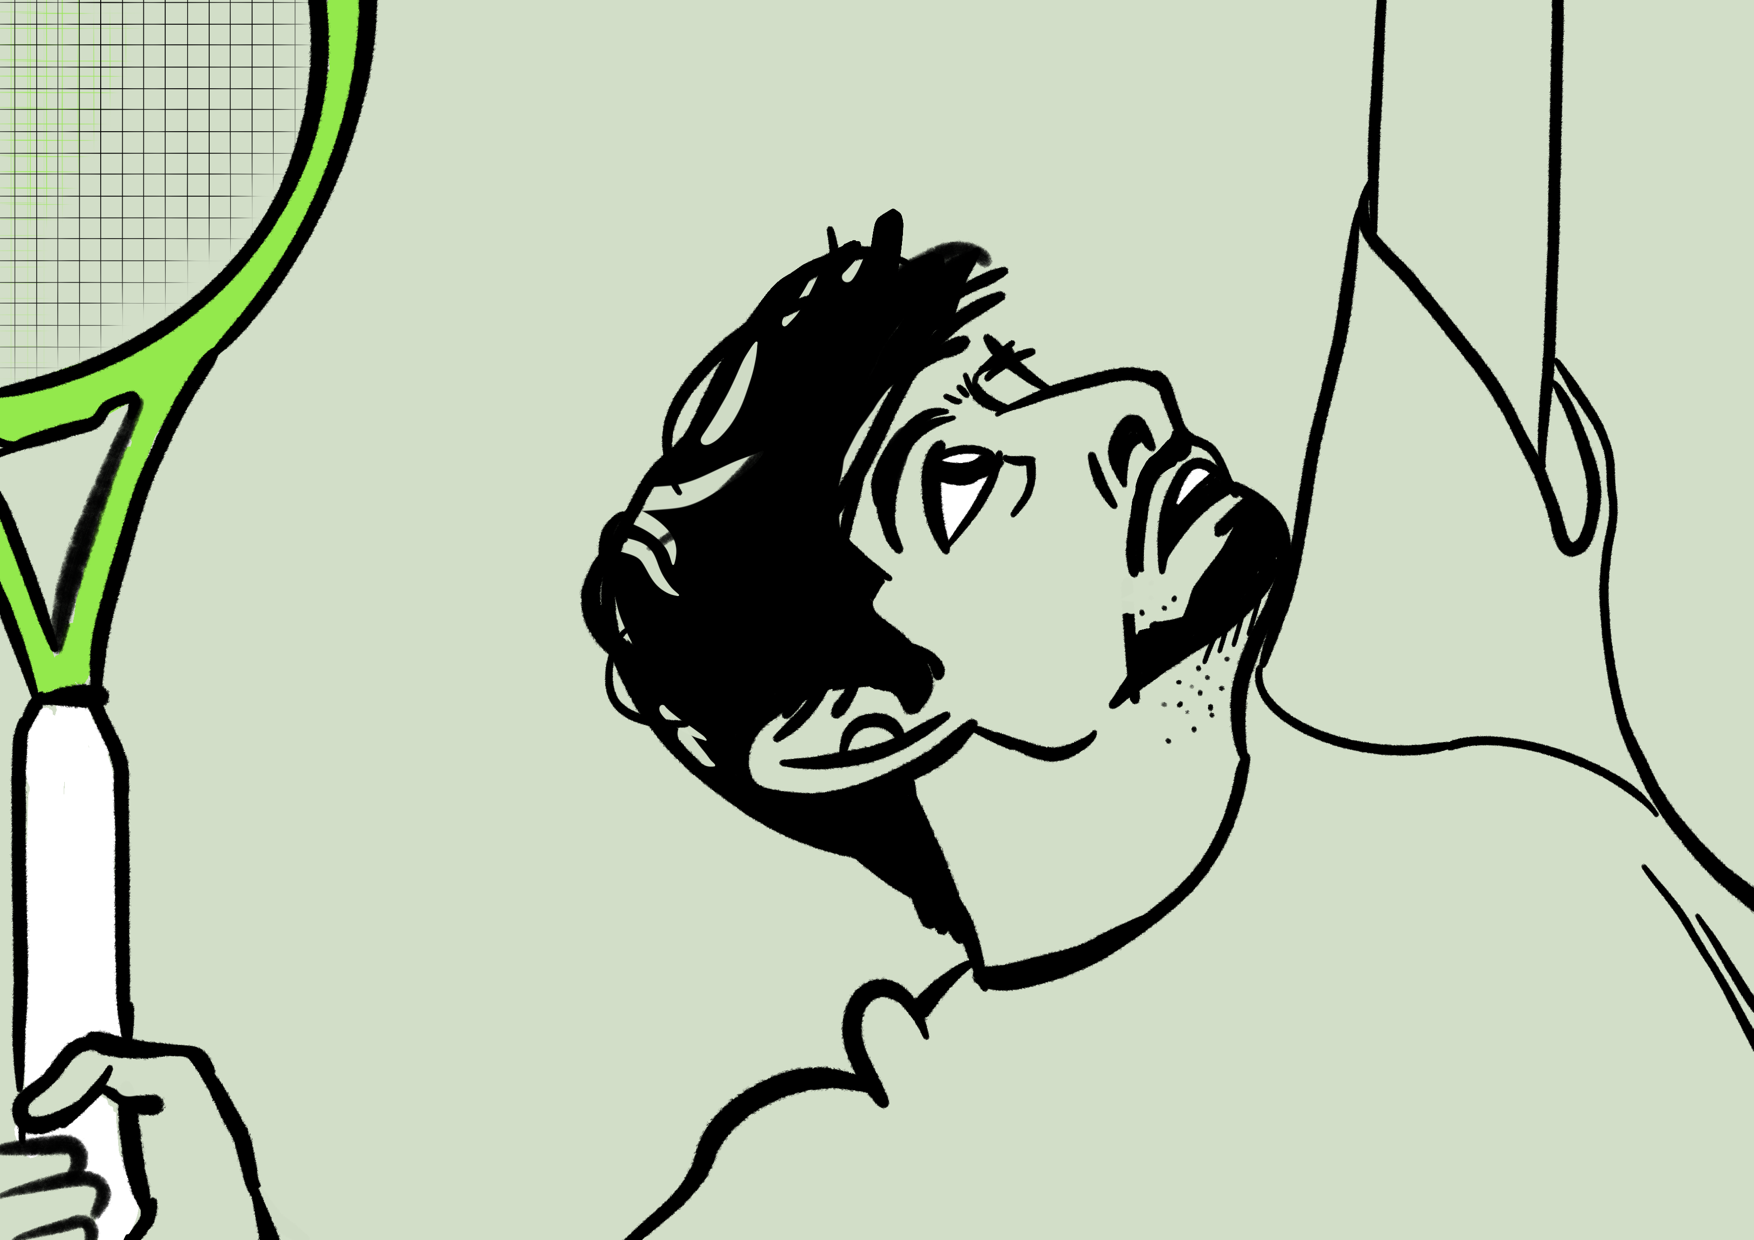
3. Reaching the Trophy Pose
What does “reaching the trophy pose” mean? As you can see in the illustration, this is the big load-up to make contact with the ball and hit your serve. After you have swung back and your ball is high in the air, you should drop your forearm into this position. With your feet and forearm comes your power. In the trophy pose, our knees should be bent with heels off the ground, so then you can use this momentum and transition it into your serve. If it helps, you can use your tossing arm to point at the ball to give more attention to your target. As you can see, in this position, the racquet is tilted upwards, ready to hit the ball.
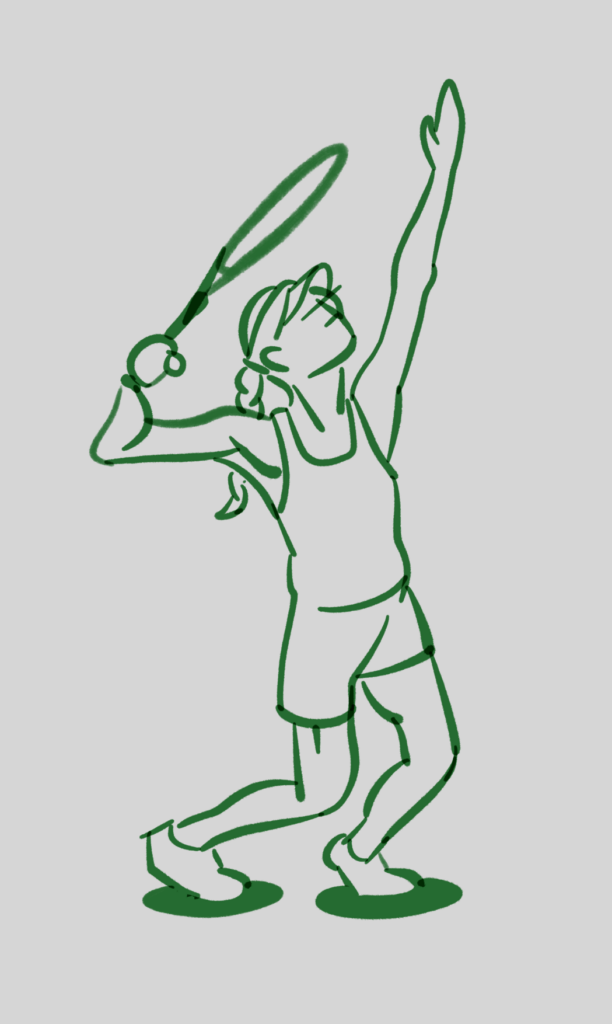
Remember to keep your head up so that you are always making eye contact with the ball. Dropping your head can cause your serve to go into the net and mess up your aim.
4. Jump and Swing
If you don’t feel as though you are getting a lot of power on your serve, there may be some separation between steps three and four. You want to make sure your trophy pose transitions into the jump and swing.
Think of the jump and swing as a spring, where you are jumping upwards and extending your body to make full contact with the ball. In this step, your body should begin to turn and rotate fully. You will start to pronate. What is “pronation”? Well, remember when you got into the continental grip where you were “greeting” the racquet? Well, if you were just to hit the ball without any rotation, it would hit the frame of the racquet. Since you want to make good contact with your racquet strings, you have to lift your dropped forearm up and straight so it is ready to hit the ball.
Think of this part as the motion you would go through to toss the ball in your hand without a racquet. This is the step all the way up to the point exactly before you let the ball go. If you can’t get pronation down at the start, don’t worry. Try to rotate and make solid contact with the ball in a way that is most comfortable, and with time, you will realize subconsciously you are doing it.
Wondering whether you got the jump and swing down? Practice your fully extended position where you would be ready to make contact. Are you turned? Did you pronate? Does it feel like you’re doing a mini stretch? Check these three items off to make sure your serve is where you want it!
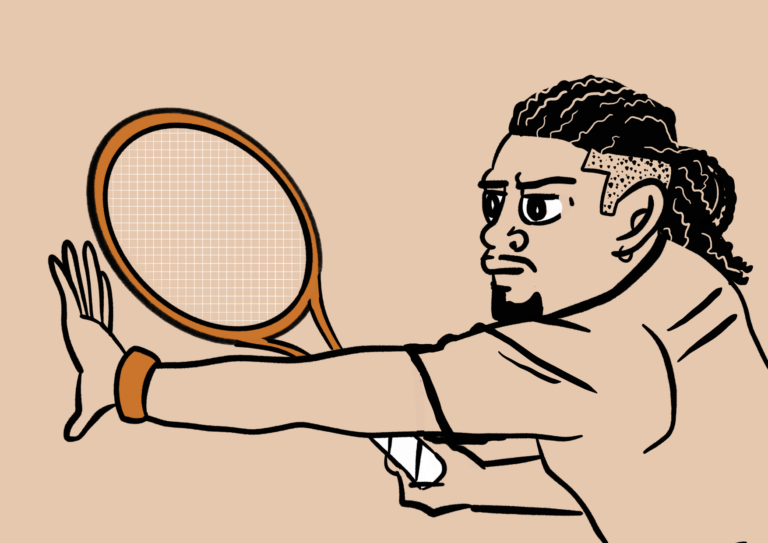
5. Making Contact with the Ball
It’s the moment of truth. When you make contact with the ball, you should be tilted, both your body and racquet. Your wrist should be fully extended, with the racquet straight, facing the net. This is why the high toss is so important, so that you can fully extend.

“Tilted” means that you should be able to make contact, if you are right-handed, above the right shoulder. If you imagine a clock, try and hit the ball between 12 and 1 o’ clock.
6. Follow Through and Landing
The follow through and landing helps your body relax and recover into a position so that you can effectively play the point. This is the most underrated step because most players forget it is the landing that sets you up to play. A lot of beginners and even intermediate players get into a bad habit of just watching their serve and hesitating with their landing. Try not to do this! As you follow through and land, try to keep the movement very natural and fluid. For righty players, this may look like

So, how can you get a comfortable and effective follow through and landing? Simply put, let your body get back into a ready position. For most right-handed players, this will look like the racquet following through and ending up on the left side of the body. After you make contact, this will feel like pulling your arm down across the torso to reach an equilibrium, and then don’t forget to hop into ready position.
How to Serve FAQ’s
Can I expect to serve like the pros do?
With pros like Ben Shelton hitting nearly 150 mile per hour serves, many tennis players want to serve like a pro immediately. After time and effort, and by mastering the technique one step at a time, your serve will gradually begin to get better. The more you work on your serve, the quicker you will see gains in all aspects of your tennis game.
What are some tips to improve my serve?
Start slow. Go through each of the steps of your serve in slow-motion to make sure the racquet and your arm are hitting the ball at the correct contact points. At the end of the day, improving your serve is all about repetition. You cannot get better without practice. Even if you can practice your technique in front of a wall, using the wall as the contact point for the ball, you will improve! Definitely find a practice partner or practice by yourself serving and getting into position. Serving alone is different from serving when there is pressure or when you know you have to play a point.
If you don’t think your serve is hard enough, especially your second serve, consider looking at ways to add spin or slice. Not every serve has to be hard and flat when you are starting out, and you can be just as competitive with a less fast but spinny serve.
Can I practice my tennis serve alone?
Yes! You do not need a basket of balls, either. Practice against a wall and try to achieve the ideal contact point–this could look like tossing the ball and letting your racquet hit the ball (softly) against a wall. You can also do the tossing the ball exercise–instead of using your racquet, use your arm to toss a ball. This way you can practice the rotation and see if you’re able to achieve the desired spinning effect of the serve.
If you can, try and use your phone to record yourself serving. This way, you can watch and see which one of these points you are struggling with. By videoing yourself, you can see if you’re falling, forgetting to rotate, or anything inbetween. This is one solo technique to help you pinpoint where things might be going wrong!
Why does my serve keep going long?
When your serve goes long, it can be a few things. Most likely, the racquet is hitting the ball too low. When you go up to make contact with the ball, step five, check and see that your forearm is fully extended and straight. Also, remember to pronate and achieve spin so that you can put your ball into a spot on the court and aim more successfully.